Piano Restoration and Refinishing
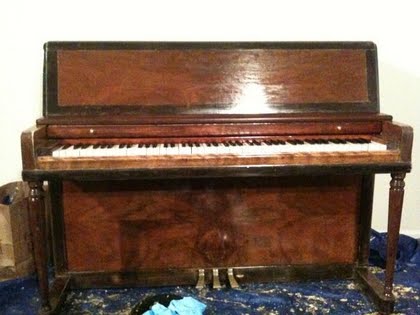
Finished Product
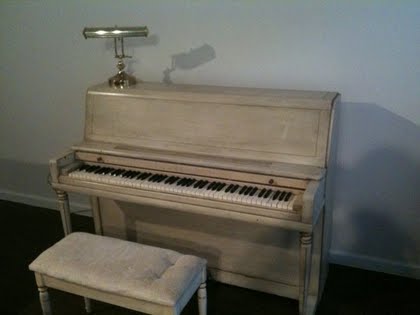
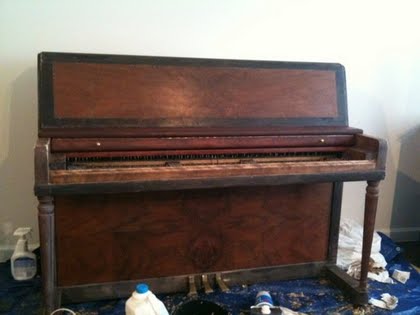
The Finish One of the first things you might have noticed about the piano is how awful it looked. At some point in the piano's long history, somebody decided it would be best to paint the whole piano a terrible off while with gold accents. They did a pretty poor job and it seems like a few pieces such as the bench top and the key cover were completely replaced with plywood.
Original Condition
Since the piano played well enough for my purposes, I decided to get to work stripping off the old awful thick white paint to get to the nice wood underneath. I did a lot of google searching before going out and buying any products. When I got around to going to Lowe's, here is what I got:
- Formby's Paint and Poly Stripper
- Denatured Alcohol
- Paint Thinner
- 2 plastic putty scrapers
- pack of rags
- pack of 0000 steel wool
- gloves(the stripper can really burn your hands)
- Tarp
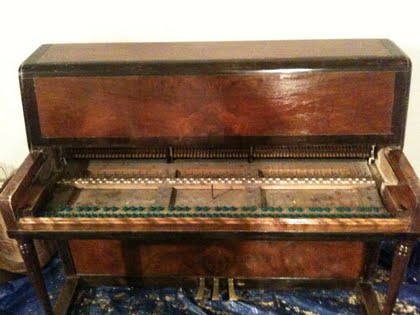
Since this refinishing is going on in our living room, we (I somehow convinced my roommates that stripping furniture finish would be fun and not at all hard work) had to be very careful about making a mess and possibly ruining our floors and walls. The first step was to cover the floor under the piano with the tarp, then I removed all the keys and cleaned out the inside of the piano. The action is staying in the piano for the stripping process (it's too delicate to just sit out on a table or something), but I did cover the action and tuning block with taped down plastic bags to protect from any chemicals that might go astray.
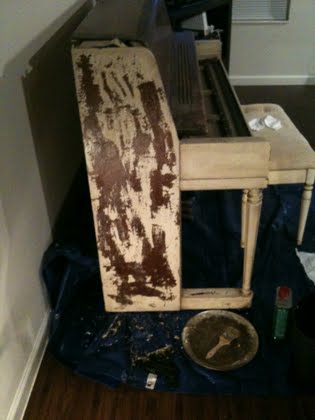
Getting started stripping the piano
Stripping the finish was pretty easy, but It took a long time. We applied a coat (the instructions say not to paint, as in multiple directions back and forth, just brush it on one way), and then waited 15-20 min. When the coat bubbled up, we used the putty scrapers to scrape off all the loose paint. It took about 5-8 coats per side for the piano before we could really see how nice the veneer underneath was.
The Desk after stripping
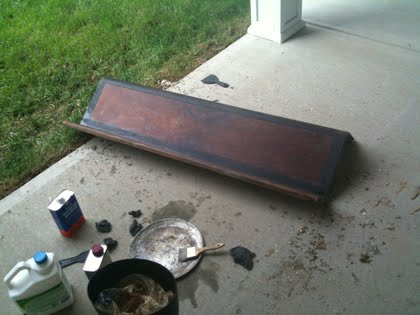
After most of the paint was stripped, a white cloudy haze remained on the surface. We used a combination of paint thinner and denatured alcohol on #0000 steel wool to buff out the paint. Some of the spots were lacquer not stripped by the previous owners, so we used acetone to clean those sections. The parts that were replaced such as the key cover and the board were taken off the piano, sanded with an orbital sander, and then stained to match the rest of the finish.
The piano fully stripped
The piano with three coats of tung oil and new felt
The Action The piano played decently well, but the keys had a lot of side to side movement, and a lot of height variance. Opening up the piano showed that a lot of the felt around the center pins, front rail, and inside the keys had gone bad or basically disintegrated. I ordered new felt from online and for around $20 I got:
- 100 center rail punching
- 1000 paper punchings(to balance key height on the center rail)
- 100 3/4" diameter green punchings for the front rail
- roll of red felt to use inside keys
I waited until after all the stripping and finishing work was done to work on the felt. I didn't want all the felt to get ruined in case of an accidental chemical spill. The front rail and center rail punchings were easy to replace. Just pull of the old ones, slide on the new ones. I still have some key leveling to do at the center rail, but that is a long process. I had originally intended to replace all the felt on the keys themselves, I must have ordered the felt that was too thick, because after gluing in the new felt, the keys would stick down, so I removed it and left the old felt.
Tuning Here is where it gets interesting for your average DIYer. Piano tuning is very complicated and takes years to learn. But I’ve always wanted to try, so I figured a free piano would be a good starting point. I bought a $35 tuning hammer online, and then started working. I started at middle C and tuned every note an octave about it. Since most notes have three strings, I started by tuning the first to a chromatic tuner, then tuning the second by ear to the first, then by playing the whole note, and adjusting the third string until I eliminated all the beats. I branched out an octave above and below the middle, constantly checking for consistency. When the notes were too high or low to be picked up by the tuner, I just tuned the first string by ear to the middle octave. Since I had to raise the pitch by around 25-30 cents for each note, I expected my first tuning to sound terrible, but in the middle 4-5 octaves, it is very listenable/playable and now is near enough to a440 that I can use the piano to play along with my iPhone and figure out songs by ear. I plan on doing another, much more precise tuning once the added tension from the pitch raise has had some time to settle out.
